Guide
How to configure MFA in Spreenity
MFA adds a one-time code from the authenticator application to login and important operations. In Spreenity, you can go into your dashboard and fill out basic details before setup, but publishing, linking accounts, billing, and other important actions require MFA confirmation.
Last updated: 06/10/2026 • about 5 min read
What app can you use
Use an app that supports one-time codes from an authenticator app. Microsoft Authenticator, Google Authenticator, 1Password, Authy and other compatible applications are compatible.
Important
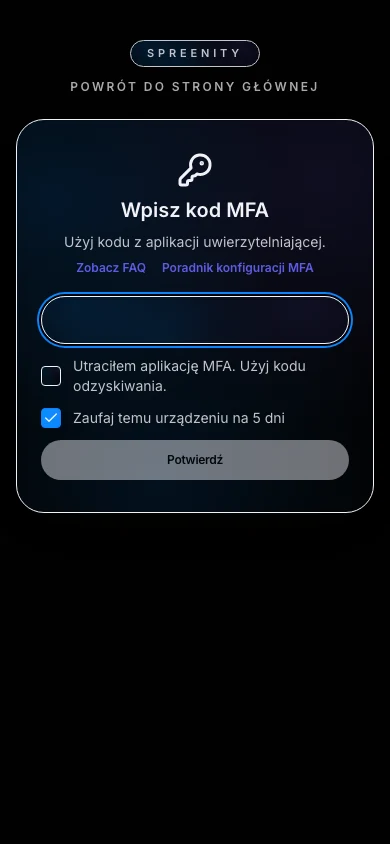
Spreenity does not use SMS or email codes as an MFA method. You enter the code from the authentication application.
Configuration via QR code
- In the dashboard, click the "Secure your publications" banner or go to the MFA configuration screen.
- Click "Set Up Now."
- Open the authenticator app on your phone and select add a new account.
- Scan the QR code visible on Spreenity.
- Enter the 6-digit code from the application into the "One-time code" field.
- Click "Confirm".
Manual configuration without scanning
If you cannot scan the QR code, please use the text key shown below the QR image. In the authenticator app, choose to manually add an account, enter your Spreenity account name, and paste or type in this key.
Once you add your account, the app will start showing 6-digit codes. Enter the current code in Spreenity and confirm the configuration.
Recovery codes
Once MFA is set correctly, Spreenity will show recovery codes. Save them right away because they are only shown once. Each code runs once and starts login recovery and replacement of your authenticator app when you don't have access to it.
The recovery code does not replace fresh MFA code and does not itself confirm MFA. After using it, you need to add a new authentication app via QR code or manual key, and then enter the current 6-digit code from that app.
Don't put off this step
Do not send recovery codes to anyone or write them down in a place where others can access them.
Trusted device and subsequent confirmations
During setup or login, you can select "Trust this device for 5 days." This allows the same browser to skip the regular MFA confirmation for several days.
Some important actions still require fresh code from the app, even on a trusted device. This includes billing, account deletion, data export, and refreshing recovery codes.
When something doesn't work
- If the code doesn't go through, wait for another code in the app and enter it again.
- Check that you are using the correct account in the authenticator app.
- If you want to complete the configuration later, use "Set up later". This does not enable MFA and does not reduce the requirements for important activities.
- If you lose access to the app, use your saved recovery code to start recovering your login and replacing your authenticator app. Then add a new application via QR code or manual key and confirm it with the current code from the application.
Related guides
How to create an account and log in with Google to Spreenity
A short guide on how to create a Spreenity account via Google, the difference between logging in and publishing connections, and what you should know about consents.
Can a social media publishing tool be GDPR compliant?
Check what to look for in public documents and visible settings if you want to evaluate a tool's approach to privacy and data.
VAT and KSeF invoices in Spreenity: how it works
A practical explanation of where to find a VAT invoice, when the KSeF number appears and what is worth setting in advance in the settlement data.
Want to move from advice to action?
If you want to prepare and publish a post faster, you can do it in Spreenity from one place.
Create an account and configure MFASee pricingSee FAQ